Thursday, January 29, 2015

in the studio with gina lee kim


Tell us a little bit about yourself.

Hello! My name is Gina Lee Kim and I’m a watercolorist that fell in love with mixed-media and art journaling. I live north of Chicago with my scientist/photographer husband, Jim, and our solar system-obsessed 3 year old son, Stephen. I’m also a registered nurse but for some miraculous, celestial alignment, I'm living a dream-come-true, artist life. Honestly, I’m just happy that my son will inherit all of his mommy’s art supplies! 


I love seeing how other artists set up their creative space. Can you tell us a little bit your studio? 

Since we’re currently renting our house in IL, I converted one of the spare bedrooms that has carpeting (yikes) into an art studio. Actually it’s a shared space with my son and we love it. I pushed my black craft/painting table into the closet and hung lights. Stephen’s art table is a converted wooden bench with the seat cushion removed. It’s the perfect platform for his height. Art supplies are always available for both big kid and little kid. :)


What inspires you? What motivates you to create? 

I remember reading a study that was done in the 70’s that tried to define creativity, spirituality and that human feeling of oneness. Of course, observing the beautify of nature was one of them, but what was fascinating (and totally true!) was to watch little children make art. Not only do I love to draw and paint with my son, his doodles always serve as the backdrop to my artwork when I’m photographing them! :)


How do you organize your creative schedule? 

As a watercolor artist and a mom, people often ask how I find the time to make art. There’s never enough time really, but somehow—even if all I have is 15 minutes a day—I make it work.  There are certain routines that help me stay organized with my creative schedule. For instance, no matter how tired I am, I make sure to rinse my watercolor brushes, clean my palette, and replace any dirty water after I’m done painting. The rest of the studio (and house) could be a mess, but I know I’ll always have my watercolor station fresh and ready to go, beckoning me to come back to create again. 


What is a typical day like for you? 

Motherhood has definitely changed how I approach art. A lot of my projects are in a holding pattern during the day but after my family goes to bed and the whole house is quiet, I am working in the studio. And if inspiration hits me really hard, I’ll be up until 1 or 2 a.m. I can’t do this every night but my husband is so awesome. He does the bedtime rituals for our son and makes Stephen breakfast in the mornings so I can sleep- in. Shhhhh, don't tell anyone but coffee makes me a better artist!


What are you working on right now? 

I am always working on my art journals! It’s how I brainstorm, visualize and make goals. It’s where I dream. My pages even help me pitch ideas to my editors and publishers. Art journaling is not only a place for color, texture, and words to come alive, I come alive. 


I am also I’m thrilled to announce my 2015 ART LESSONS with Cloth Paper Scissors and F+W Media! I was asked by the editors to do these exclusive four volume series in which I explain a lot of my watercolor techniques and how I use mixed-media (with ink, colored pencils, crayons, oil pastels, glass bead gel, paint pen markers, transparencies, collage, a bit of sewing…you name it). These downloadable lessons come with step-by-step instructions and video links to help bring it all together. Please enjoy this short clip: 


PROMO: ART LESSONS with Gina Lee Kim (CPS) from Gina Kim on Vimeo.

To see more of Gina-check out her website: http://www.ginaleekim.blogspot.com or follow her on Instagram username is: ginaleekim.


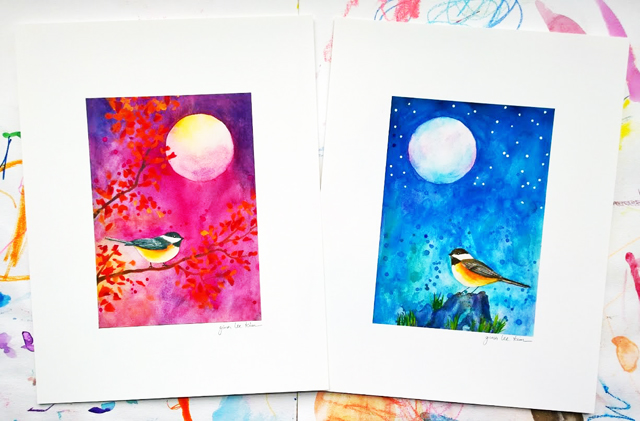
And lovely Gina is giving away 5 art prints of her popular chickadee prints!

To enter to win-
Leave us a comment, tell us your favorite supply to use in the studio.
The 5 lucky winners will be announced over on Gina's blog http://ginaleekim.blogspot.com on Thursday, February 5, 2015 by 12pm EST


"In the Studio" is a new feature here on the blog where I share a glimpse into friends and fellow artists and crafters spaces. 


If you are interested in submitting your studio to be featured, send me an email at alisaburkesubmissions@gmail.com

Tuesday, January 27, 2015

introduction to lettering


Hello everyone! I'm Megan of Makewells, and I'm quite thrilled to be contributing to Alisa's blog today. She asked if I'd share some tips on hand lettering, one of my favorite things to do. I don't consider myself to be an "expert letterer"; however, after about three years of truly investing my time in developing the skill, I have some tips and tricks that work for me. So I'm excited to share a few of these things with you.

But, first, I just want to talk briefly about what hand lettering is: put simply, it's the art of drawing lettersThat is a key thing to remember no matter where you are in your hand lettering skill set. We aren't talking about typography (the art of arranging type) or technical calligraphy.


One way to think of the difference between calligraphy and lettering is that calligraphy is based on penmanship, or writing letters, while lettering is based on draftsmanship, or drawing them. So to improve your lettering skills, essentially you are looking to improve your drawing skills. 


Getting started with hand lettering is easy (and cheap!). All you need is your basic drawing supplies: pencils, an eraser, paper, tracing paper, and a straight edge. And none of these need to be fancy. Most of my sketches are done with a mechanical pencil in my sketchbook or on basic copy paper. You can invest in lined or gridded paper, though I prefer to draw my own guides using a straight edge. 


As you become more skilled at lettering, you can add to your collection of drawing tools and surfaces. I'll be sharing some of my favorites in my next post. But, for now, that simple set of supplies I mentioned above is all you need.

When getting started lettering, it's important to get to know a few basic types of letters. I've highlighted three of these below:


From the three types of letters above, there are infinite ways to draw the 26 letters in the alphabet (52 if you think upper and lowercase)!

And that is what I love so much about lettering: there are endless possibilities. Not only can each letter be drawn an infinite amount of ways, but the combining of letters to form words, and words to form phrases, opens up a world of creative interpretation that could go on forever. 

Which leads me to my favorite go-to practice exercise. 


I know it sounds like a lot, but I believe so much in this exercise. Not only are you getting valuable practice drawing each letter, but you are also stretching your creativity to find innovative ways to interpret them. 

I have pages and pages in my sketchbooks dedicated to letters - which serve just as much as practice in the moment, as inspiration when I'm creating work in the future. 
I chose the letter A, but you can choose to start with any letter you'd like.


One way to discover the many variations of a single letter is by utilizing tracing paper. Draw the main body of your letter on white paper. Then, using the tracing paper, trace that same letter, varying a small detail each time. 


Below are some simple variations you can try.


Have fun practicing - you will be surprised how easy it is to come up with 100 variations! 


If you do complete the exercise, post your photos on Instagram so we can see. Use #redefinecreativelettering - we can't wait to see what you guys come up with!

Makewells Instagram: www.instagram.com/makewells

Monday, January 26, 2015

creating with a kid: paint with your feet

We spend a lot of time outside but this time of year on the Oregon Coast can get a little bleak with days and days of rain. And while I have all kinds of fun and creative projects to keep Lucy busy and inspired, I save few of the really special (and messy projects) for days (like the grumpy ones) when everyone needs something extra special to work on! One of those special projects is painting with our feet and let me say that letting your three year old paint with their feet is not for the faint of heart but it is a really fun way to get creative and let loose with your kids. 

This is the kind of activity that requires a little set up and clean up time. Even though I am the queen of making a mess I still lay down paper or a drop cloth before we dive into painting. 

TIP: This is also a great outdoor activity for warm days and much easier when it comes time to clean up! 

You can paint on just about anything large enough to walk on- paper (I like butcher paper or brown painter's paper), fabric, canvas or even cardboard. Paper surfaces can get slick with paint (it's easier to slip around) while canvas and fabric are less slippery.

I love using my bare feet but Lucy is not into it yet so we grab a pair of summer shoes (that can be washed) and let her go crazy with them on. 

TIP- You can also get really creative with putting different things on your feet- bubble wrap, socks or anything that will create unique pattern or texture on the surface.

We start by dumping acrylic paint onto the surface- this step might be Lucy's favorite because she seems to love having the control and ownership dumping out all those bottles of paint.

Then I let her go crazy in all that paint- walking, marching, stomping and dancing! 

More paint is dumped and more craziness is had!

And don't think painting with your feet is just for kids...this kind of project is for anyone, any age especially those who might need to blow off some steam or let loose!

TIPS FOR ANY AGE:

If you or your child is not comfortable getting dirty or messy with your feet, at least try using your hands to apply paint! This is a great way to get yourself accustomed to what it feels like to use your body.

Blast your favorite music! Using your body to paint is all about expression and movement and having music on will make it even more fun.

Embrace expression and abstraction! Painting with your body is more about the experience and painting in an abstract way. Try to forget about things looking and feeling perfect and instead give yourself permission to get lost in the process and the mess.

Just let go, enjoy the moment and forget about the giant mess that is happening. The worst case scenario is that you have some cleaning to do when everything is over! 

You can read my entire series of "creating with a kid" posts HERE

Thursday, January 22, 2015

love on SALE!

I've got a fresh batch of my Heart to Art Remix for Demdaco love scarves and love pouches in shop. I think they make the perfect Valentine's Day gift or any time gift and from now until February 14th I've got them marked down! Head on over to the shop HERE for a little SALE on love!

Wednesday, January 21, 2015

office statement wall

While I have a great studio space where I host classes and work on all kinds of creative (and messy) projects, my home office is actually where a lot of the magic happens for me. And by magic, I mean hours upon hours spent in front of a computer screen editing photos, writing and editing video and online class content. At this point in my life I really love working from home but sitting in an office, in front of a computer can feel anything BUT inspiring so I am always changing things up to keep things feeling more creative and less office-like. So with the new year, I got busy cleaning and organizing my office. Just as I was finishing up, I felt like there was something missing and I got that familiar hankering to paint a wall- you know how I love to paint a wall!

I knew right away that I wanted to paint a mandala inspired design. A mandala is actually really easy to create because it is simply a series of repeating designs in a circle. I don't get too crazy with measuring things out, I just start with a circle (I usually trace something round) and then go for it! 

When I am painting a wall with a lot of pattern and line work I like to use acrylic paint mixed with a little bit of water. 

Since our walls have texture on them it keeps things from lines being really clean and perfect but I just work go ahead and embrace it.


I kept building and building the embellishments until the entires section of the wall was filled.

The wall adds just the perfect amount of creativity (for me) and my work space and the best part is that it's just paint! When or if I ever want a change I can paint over it!


LinkWithin

Related Posts with Thumbnails